For this week’s tech DIY I wanted to do something with wire management as this is something I struggled with personally because tangled wires and messy cables are the bane of every tech enthusiast’s existence. If you’ve ever found yourself wrestling with a knot of cords under your desk or behind your entertainment center, this DIY project is tailor-made for you. Let’s transform a simple plastic cup into a chic cable organizer that not only declutters your space but also adds a personalized touch to your setup.
Materials You’ll Need:
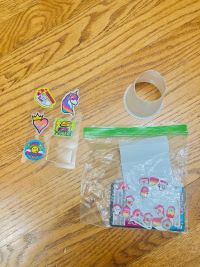
- Plastic Cup: Choose a sturdy plastic cup. Transparent cups allow for a see-through effect, while colored ones can add vibrancy.
- Decorations: This is where your creativity shines! Gather items like:
- Stickers
- Acrylic paints
- Washi tapes
- Glitter
- Ribbon
- Markers
3. Scissors or Craft Knife: Ensure they’re sharp for clean cuts. (If using a craft knife, exercise caution.)
Step-by-Step Instructions:
- Preparation:
- Safety First: Lay down old newspapers or a crafting mat to protect your workspace.
- Clean the Cup: Ensure the plastic cup is clean and dry. Any residue can affect the adhesion of decorations.
2. Removing the Bottom:
- Mark the Cut Line: About an inch from the bottom, use a marker to draw a guideline around the cup. This ensures an even cut.
- Cut Carefully: Using your scissors or craft knife, pierce a small hole along the line and begin cutting. Rotate the cup as you go to maintain a straight cut. Once done, safely dispose of the removed bottom piece.
3. Designing Your Organizer
- Paint Away: If you’re using paints, apply a base coat first. Let it dry before adding designs or patterns.
- Stick It: Apply stickers in patterns or randomly for a fun look. Layering can add depth.
- Wrap with Washi Tape: Create stripes or geometric patterns by wrapping washi tape around the cup.
- Add Glitter: Apply a thin layer of craft glue where you want the glitter, sprinkle it on, and shake off the excess. Seal with a clear spray to prevent shedding.
- Personal Touches: Write inspirational quotes, doodle, or even attach small faux flowers.
4. Final Touches:
- Drying Time: If you’ve used paints or glue, allow the cup to dry completely to prevent smudging.
- Smooth Edges: Run a piece of fine-grit sandpaper around the cut edge to smooth out any roughness.
5. Organizing Your Cables:
- Implementation: Slide your cables through the open bottom, letting the plugs rest inside the cup. This keeps them accessible yet organized.
- Placement: Position your new cable organizer on your desk, nightstand, or any area prone to cable chaos.
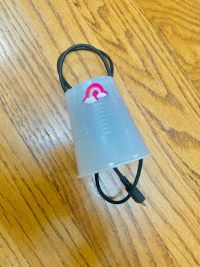
Voila! Your Personalized Cable Organizer is Ready!
Not only have you crafted a functional tool to tame the cable clutter, but you’ve also added a piece of art to your space. This simple DIY showcases how everyday items can be repurposed creatively. So, the next time you see a stray plastic cup, you’ll know it’s not just trash — it’s potential waiting to be unlocked. Until next week where we try to reduce the amount of tech waste in the world!